If you’ve worked on an Arduino project before, then there is a big chance that you’ve had to rely on a library. Libraries are pre-written code modules that provide specific functionalities. They allow programmers to easily reuse and integrate existing code and functions into their projects without rewriting everything from scratch. You can write your own libraries that include functions you might want to use across multiple different projects. Alternatively, you can download and use existing libraries written and published by other programmers.
Using libraries when working on Arduino projects is important, especially when you are using sensors, screens, or any other component. Most components will have an existing library that you can use, and this allows you to focus on the unique aspects of your project. By using existing libraries, you can avoid writing your own code each time for a new component, and you can focus on writing the important code for your project, allowing you to save a lot of time and effort.
Using the Arduino IDE, many libraries can be found in the Arduino Library Manager. These libraries are simple to install and setup, as the IDE will do all of the work for you. However, some libraries cannot be found in the Arduino Library Manager. These libraries need to be downloaded from an external source and then added to the IDE to be able to use them. These external libraries (also called third-party libraries) can be found from many different sources, and some of the popular ones include GitHub and PlatformIO. In this blog, I will be showing you how to use libraries from the Arduino Library Manager, as well as how to add external libraries to the Arduino IDE.
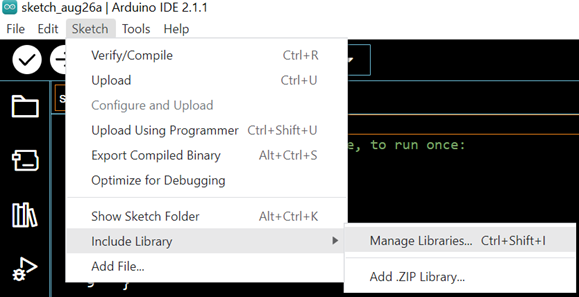
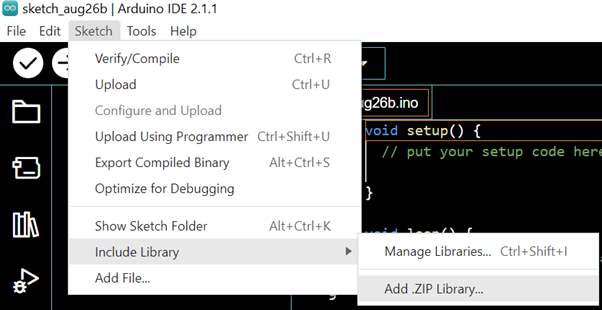
We will start by installing a library using the Arduino Library Manager. The first step is to know which library you want to install, and for this example, we will be using the LiquidCrystal library by Arduino and Adafruit. The second step is to open the Library Manager in the Arduino IDE. This can be done by going to Sketch > Include Library > Manage Libraries, as shown below.
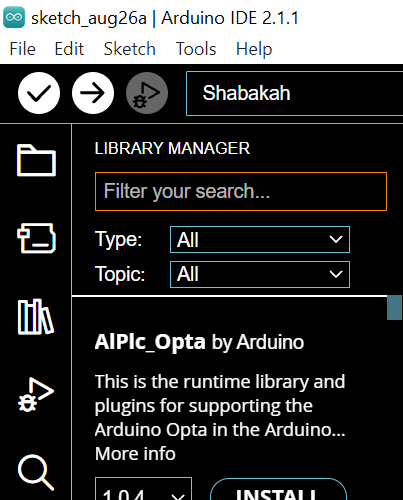
This will open up the Arduino Library Manager. Alternatively, you can directly access the Library Manager by clicking on the Library Manager symbol on the lefthand side of the Arduino IDE.
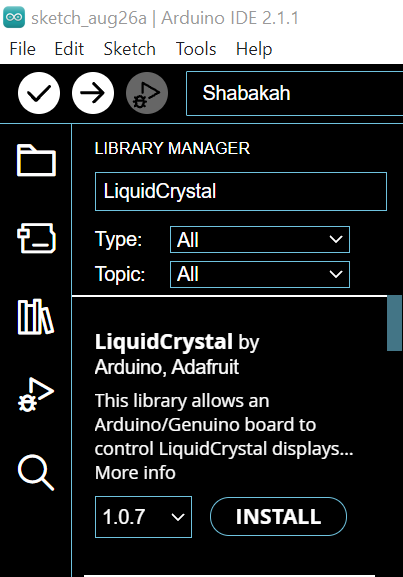
Once the Library Manager is open, you can now search for whatever library you want to install. In this example, we will search for LiquidCrystal. Once you find the library, you can click on install to download it.
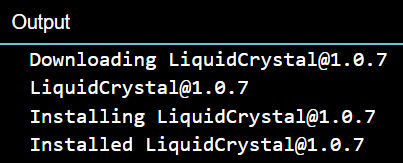
After a few seconds (or minutes depending on your internet speed), the library will be installed and ready to use.
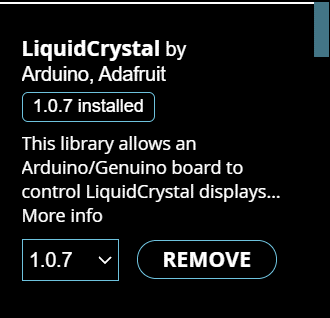
You can follow the same steps if you want to remove the library. Just find the library in the Library Manager, and click on remove, as shown below.
An advantage of using the Arduino Library Manager is that you can easily update libraries to their latest version when a new version is released. If an update is available for one of your installed libraries, you can find it in the Library Manager and simply click on update to get the latest version.
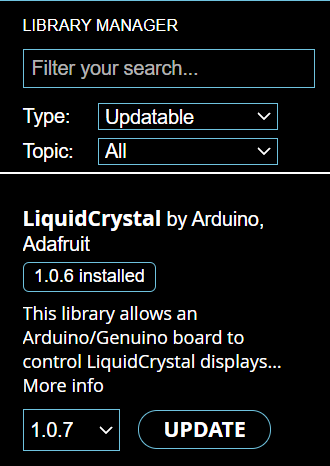
The Arduino IDE also informs you when an update is available for one of your libraries, making it easy to always have the latest
versions installed and ready to use.
If you have a library that you want to use, but it isn’t available on the Arduino Library Manager, then you need to follow different steps to add it to the Arduino IDE. The first step is to find the library on an external source (such as GitHub or PlatformIO) and download it. Usually, external libraries are packaged in a ZIP file once you download them. For this example, we will be using the Remal IoT – Traffic Light LED Module library, which you can download here. Once you have the library’s ZIP file, adding it to the Arduino IDE is simple. You need to go to Sketch > Include Library > Add .ZIP Library, as shown below.
Then, you need to find the library’s ZIP file on your PC and select it. If this is done correctly, you should see the below message.
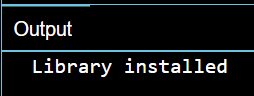
This indicates that the external library has been successfully installed, and it is now ready to use.
You’re probably wondering how you can verify that the library was successfully added to the IDE. Most libraries come with pre-written examples that show you how to use the library’s functions. If you can access these examples from the Arduino IDE, then you can confirm that the library was successfully added. To do this, go to File > Examples, as shown below.
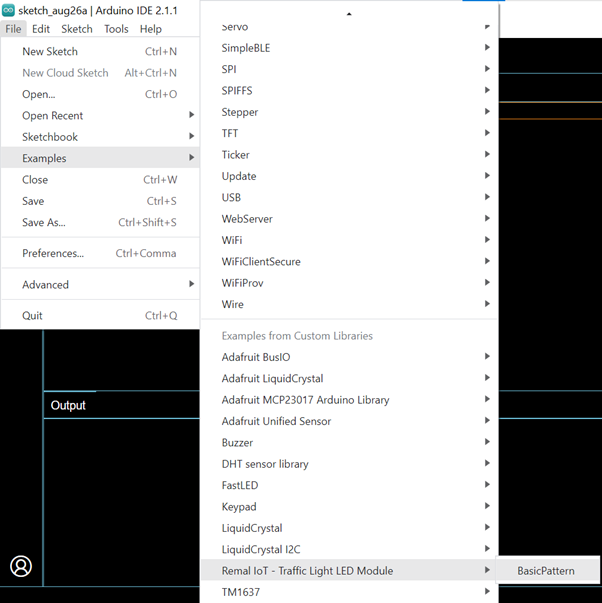
You can open any of the examples from the library that you have installed. If you were following along, then you can open the BasicPattern example from the Remal IoT – Traffic Light LED Module library. If the library was installed correctly, then you can open up the example and look at the demo code to see how the library is used, and you can utilize its functions in your own projects down the line.
To summarize, you can either find libraries using the Arduino Library Manager or external sources. In both cases, installing the library is simple, and you just need to follow the steps that have been discussed to add the library to the Arduino IDE, whether it’s through the Library Manager or by manually adding the ZIP file. You can verify the library’s installation by accessing one of the examples. This also allows you to see how the library can be used, which will come in handy once you start working on your own projects using the library. If a library was added successfully, all you need to do is include it in your project, and then you will be able to access its classes and functions to do whatever is needed for your project. I recommend exploring many of the different available libraries, as it will help you enhance your Arduino project while also saving time and simplifying development.