This post showcases the effect of button bounce and there are many techniques to correct it, including using either hardware or software solutions.
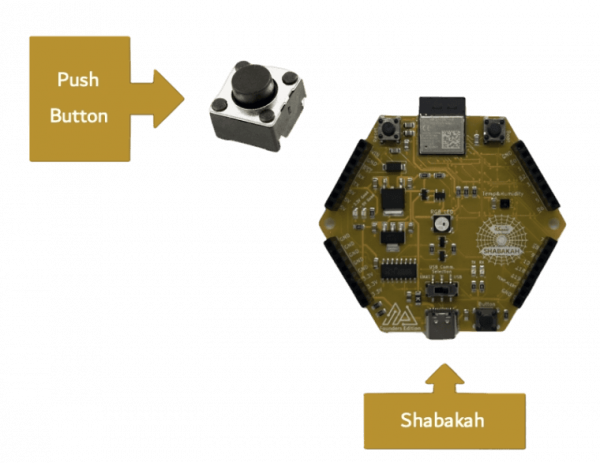
Push buttons are basic switch mechanism often used to turn on or off the control circuit. Push buttons typically have a button or actuator, contacts, and a spring mechanism. When the button is pressed, the spring mechanism compresses enabling the contacts to make an electrical contact with one another and closing the circuit.
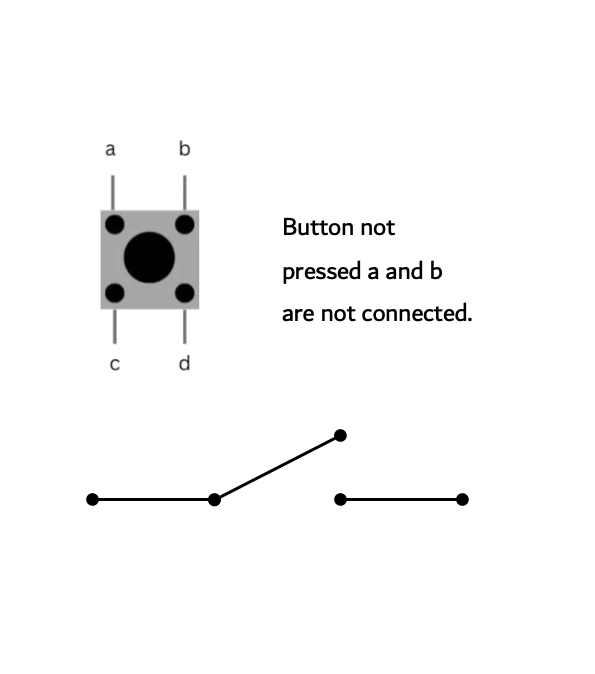
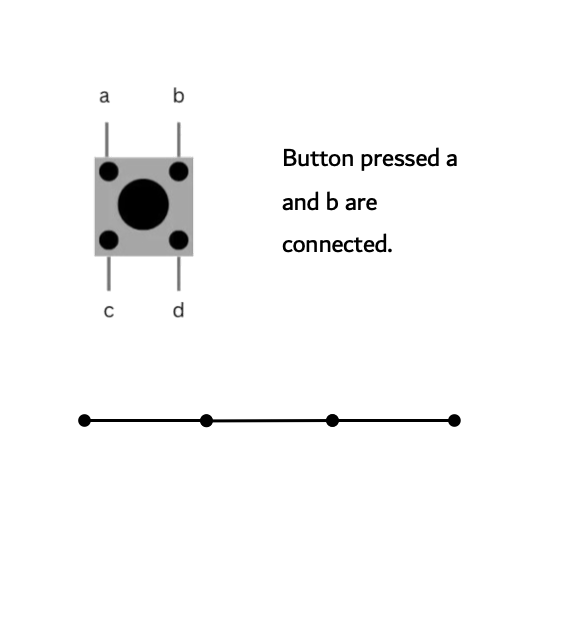
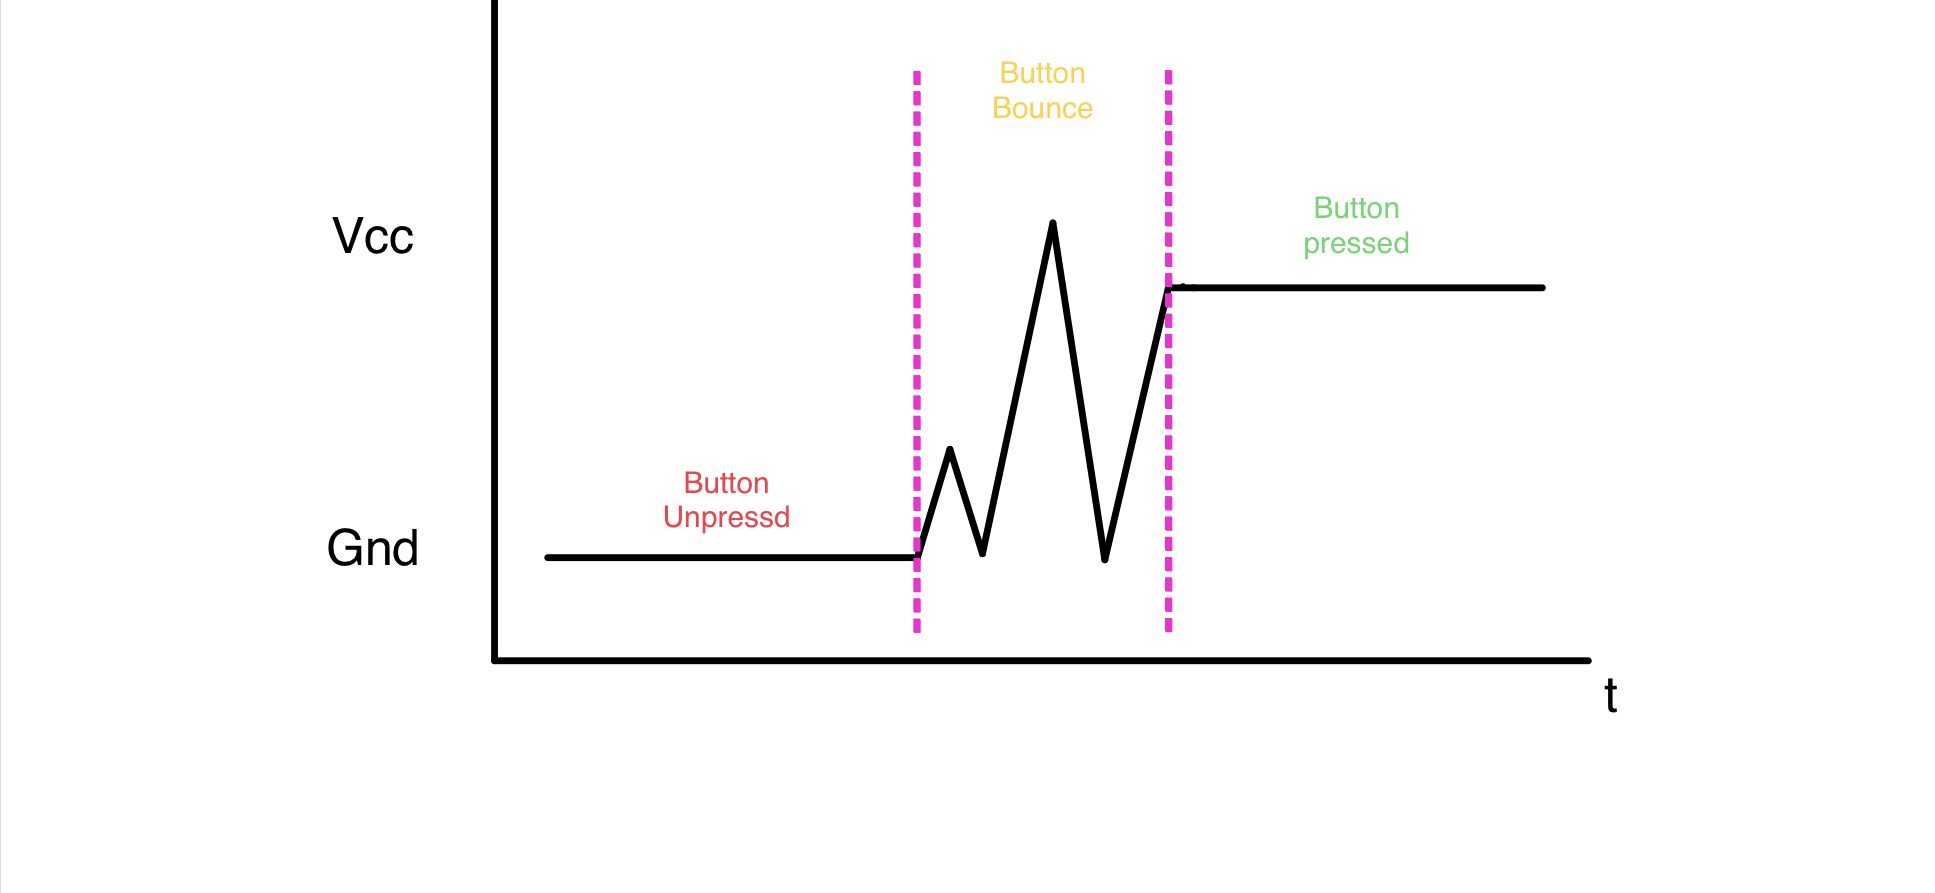
Humans perceive pressing a button smoothly switches the circuit from open to closed. However, because computers operate considerably more quickly than people, this state change does not occur steadily. After a button is pressed, a small amount of electrical noise is produced as the button quickly oscillates between states. The two piece of metals that come into contact when the button is pushed could make, and break contact several times before being tightly pressed together. Hence, he computer interprets this noise as a number of button hits, resulting in undesirable behavior.
The basic hardware method is to debounce using a resistor and a capacitor. The use of these specific components will filter out any sudden changes in the signal. The ideal resistor and capacitor values should be chosen so that the product of RC roughly equals the desired debounce time.
The capacitor here is the most important component. It restricts how quickly the voltage can change over time and is extremely effective at debouncing. Moreover, the capacitor works by charging and discharging ate every voltage drop which helps flattening the button bounce.
To properly design a debounce circuit, we need to use both a capacitor and a resistor. This combination makes an RC filter that can be used to eliminate fluctuating frequencies.
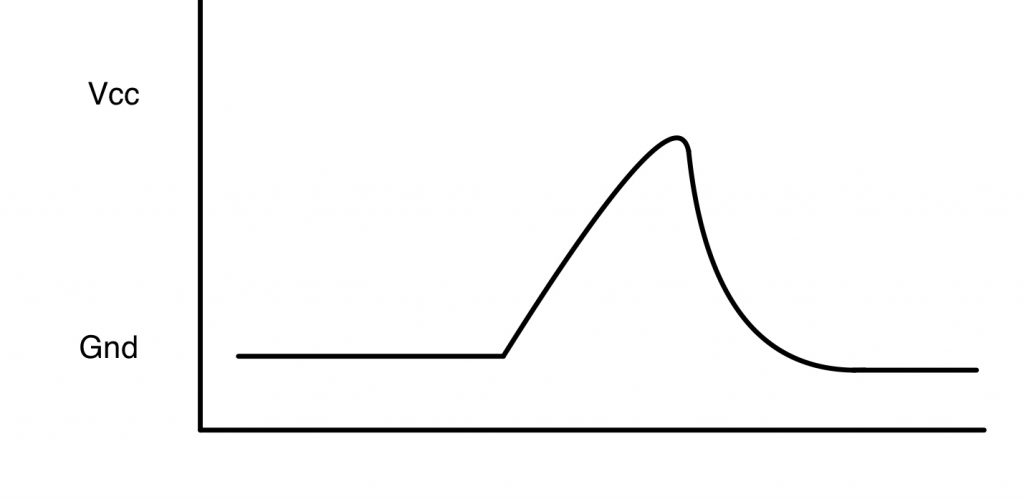
Last but not least, the figure above shows the button signal after implementing the debounce circuit. As illustrated, the RC filter significantly reduces the rate of voltage change. However, it is a partial solution it wouldn’t work always but if the product of RC picked was large enough then it would work perfectly.
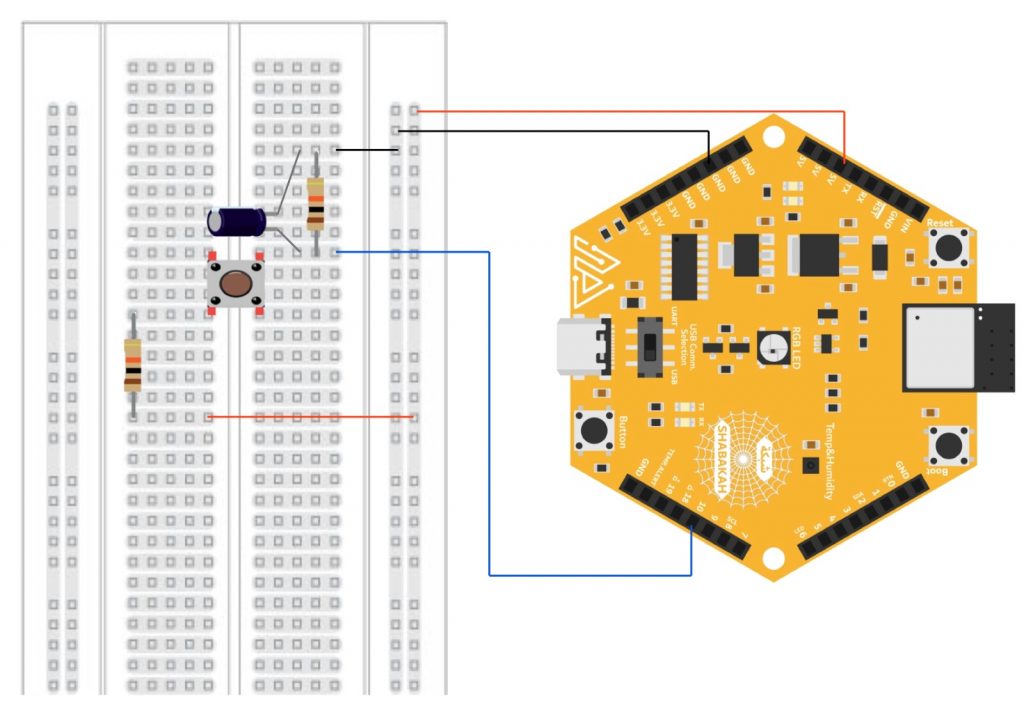
Shabakah focuses on wifi, bluetooth mesh and low energy application. It is simple and has everything needed for the circuit work. other remal boards would also work.
From Shabakah we could use any I/O pins to connect our components. In this case, we would require two resistors of 10kOhm, one capacitor of 0.1uF, bread board, and a push button button.
First, I placed the push button on the bread board. Then, I connected the capacitor and the resistor to the right side of the button. After that, I connected the 3.3V voltage source of Shabakah to the bread board and the ground source from Shabakah as well to the bread board. Next, the voltage source is now connected to the current limiting resistor that was placed on the top left side of the button. Meanwhile, the button right side was connected to pin 10 on Shabakah. Finally, the right side of the capacitor and the resistor is connected to ground.
Overall, this is how to build the button debounce circuit using RC filter.
In summary, here’s what you’ll need:
On the other hand, the software solution does not require any additional components. There are two approaches that I will be discussing.
					//A delay of 1000 ms
delay(1000);
Moreover, every solution has its flaws. The main disadvantage of adding delays is that it approximates the bounce event and is not an exact number because the time out might be affected by a number of factors like the device life, humidity and temperature, and dust particles in the air. Hence, the user might overestimate the bounce time and lead to undesired behaviors.
So far, I have presented two different ways to debounce a button: a hardware solution that uses additional components a resistor and a capacitor, and then a software solution that simply uses a delay function.
In any case, each solution has its own pros and cons as illustrated in the table below:
| Hardware Fix | Software Fix |
|---|---|
| Pros: Always works | Pros: Less components |
| Cons: Additional components required | Cons: the time delay is an approximate |
This was a fun project to work on and an interesting problem to tackle. I hope this blog post helps!