Building a simple calculator using Shabakah board and an LCD display is a great option if you’re searching for the ideal beginner’s project to get started in the world of microcontrollers. This blog post will walk you through the steps and provide you a thorough, step-by-step breakdown of how to make your own calculator using Shabakah board.
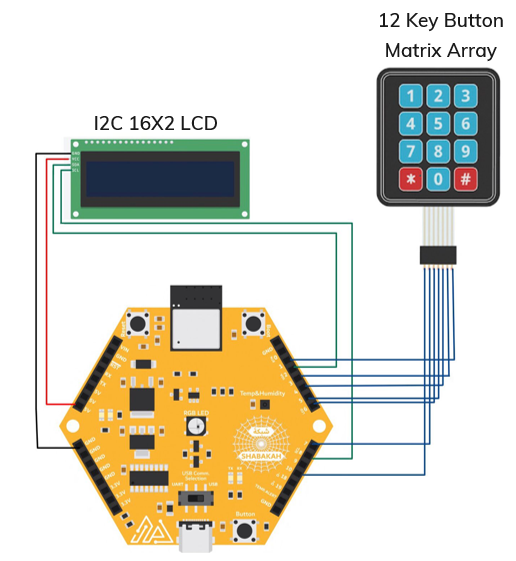
Our objective is to create a simple calculator that can perform addition and subtraction operations. This will be accomplished using a Shabakah board, an LCD screen, and a keypad. With specific buttons for each operation, this interactive calculator will be simple to use. The calculator supports multiple-digit numbers and we’ll primarily use the LCD display as our user interface. The inputted numbers and operators will be displayed on the LCD. Once the calculation is executed, the result will be displayed on the screen.
Let’s set up the hardware first before we start writing code:
Our calculator will allow users to input numbers and operators, execute calculations, and see results. Here’s how it works:
The code is the brains of our calculator project. The code is written in Arduino, you can can find it below and the main parts of the code explained along with what they do.
/**
* @file calc.ino
* @author Hoor Al Ali, Remal IoT
* @date 9 july 2023
*
* @brief The provided code represents a simple calculator project
* implemented using an Shabakah board and an LCD display.
* The purpose of this project is to create a basic calculator
* that can perform addition and subtraction operations. You
* can use the two buttons (labeled "Boot" and "Button"),
* "Boot" button is responsable for the '+' operation in the
* calculater while the button "Button" is resposable for the '-'
* operation. The '#' button in the keypad is for '=' and the
* '*' button on the keypad is to clear the calculator.
*
*
* This code is based on the reference code available at:
* Reference:[https://gist.github.com/suadanwar/a3b9feb461b148a119aa645feaf17073]
*
*
*/
#include <Keypad.h>
#include <LiquidCrystal_I2C.h>
LiquidCrystal_I2C lcd(0x27, 16, 2); // set the LCD address to 0x27 for a 16 chars and 2 line display
const byte ROWS = 4; // Define the number of rows in the keypad
const byte COLS = 3; // Define the number of columns in the keypad
char keys [ROWS] [COLS] = {
{'1', '2', '3'},
{'4', '5', '6'},
{'7', '8', '9'},
{'C', '0', '='}
};
byte rowPins[ROWS] = {10, 7, 6, 5}; // Assign the row pin numbers for the keypad
byte colPins[COLS] = {4, 3, 1}; // Assign the column pin numbers for the keypad
//Create an object of keypad
Keypad myKeypad = Keypad( makeKeymap(keys), rowPins, colPins, ROWS, COLS );
boolean PresentValue = false; // Flag to indicate whether an operator has been selected
boolean Final = false; // Flag to indicate whether the calculation is ready to be performed
String Num1, Num2; // Strings to store the numbers entered by the user
int Answer = 0; // Stores the result of the calculation
char Operator; // Stores the selected operator (+ or -)
void setup()
{
lcd.init(); // Initialize the LCD display
lcd.backlight();
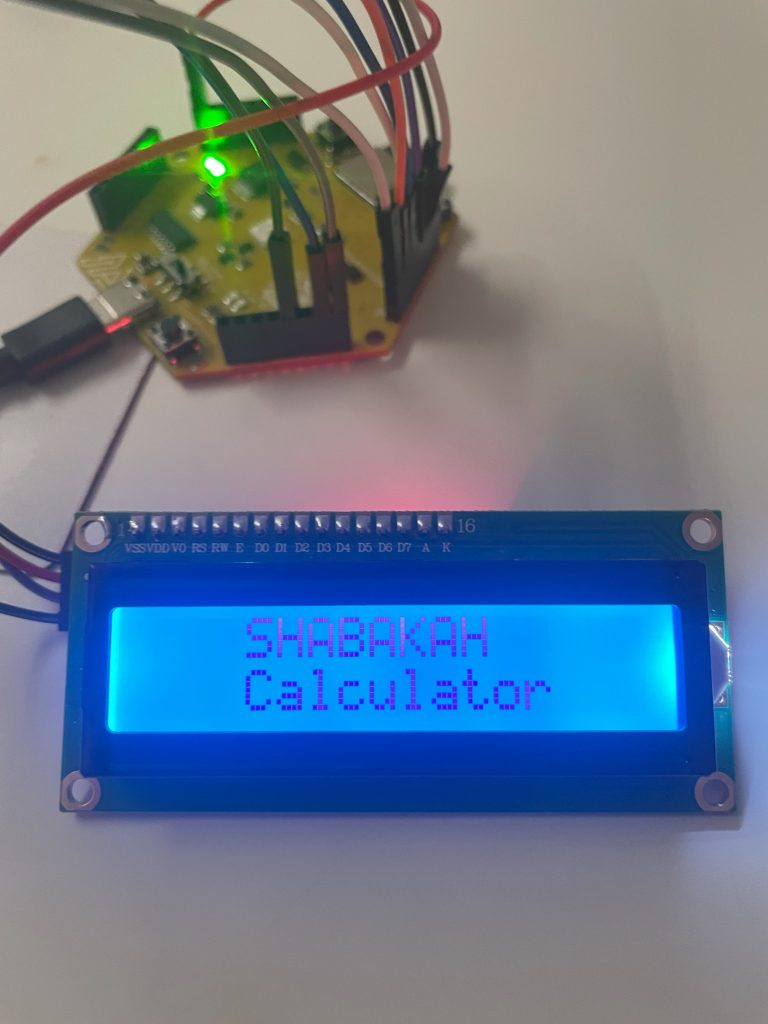
lcd.setCursor(3,0); // Set the cursor position for the title
lcd.print("SHABAKAH");
lcd.setCursor(3,1);
lcd.print("Calculator");
delay(3000); // Display the title for 3 seconds
lcd.clear(); // Clear the LCD screen
// Initialize Buttons
pinMode(SHBK_BTN, INPUT); //pulled-down and debounce accounted for externally
pinMode(SHBK_BTN_BOOT, INPUT_PULLUP); //No external pull-up, must be done internally
}
void loop() {
char key = myKeypad.getKey(); // Read the key
if (key != NO_KEY && (key == '1' || key == '2' || key == '3' || key == '4' || key == '5' || key == '6' || key == '7' || key == '8' || key == '9' || key == '0'))
{
if (PresentValue != true) // if the operator is not pressed yet
{
Num1 = Num1 + key;
int NumLength = Num1.length(); // to determine Num1 length
lcd.setCursor(0, 0);
lcd.print(Num1);
}
else
{
Num2 = Num2 + key;
int NumLength = Num2.length();
int NumLength1 = Num1.length();
lcd.setCursor(1 + NumLength1, 0); // setting the cursor position one column ahead of Num1
lcd.print(Num2);
Final = true;
}
}
// Handle '+' operation
else if( !digitalRead(SHBK_BTN_BOOT) ) // pressing the boot button
{
if (PresentValue == false)
{
int NumLength = Num1.length();
PresentValue = true;
Operator = '+';
lcd.setCursor(0 + NumLength, 0);
lcd.print(Operator);
}
}
// Handle '-' operation
else if( digitalRead(SHBK_BTN) ) // pressing the boot button
{
if (PresentValue == false)
{
int NumLength = Num1.length();
PresentValue = true;
Operator = '-';
lcd.setCursor(0 + NumLength, 0);
lcd.print(Operator);
}
}
// Handle calculation and display result
else if (Final == true && key != NO_KEY && key == '=') {
if (Operator == '+')
{
Answer = Num1.toInt() + Num2.toInt();
}
else if (Operator == '-')
{
Answer = Num1.toInt() - Num2.toInt();
}
lcd.clear();
lcd.setCursor(8, 1);
lcd.autoscroll();
lcd.print(Answer);
lcd.noAutoscroll();
}
// Handle clearing the calculator
else if (key != NO_KEY && key == 'C') {
lcd.clear();
PresentValue = false;
Final = false;
Num1 = "";
Num2 = "";
Answer = 0;
Operator = ' ';
}
}
We start by including the necessary libraries, including Keypad.h and LiquidCrystal_I2C.h. Make sure to install the libraries.
					#include <Keypad.h>
#include <LiquidCrystal_I2C.h>
Initialize components, initialize the LCD display and define the keypad layout using a 2D array:
					LiquidCrystal_I2C lcd(0x27, 16, 2); // set the LCD address to 0x27 for a 16 chars and 2 line display
const byte ROWS = 4;  // Define the number of rows in the keypad
const byte COLS = 3;  // Define the number of columns in the keypad


char keys [ROWS] [COLS] = {
  {'1', '2', '3'},
  {'4', '5', '6'},
  {'7', '8', '9'},
  {'C', '0', '='}
};
byte rowPins[ROWS] = {10, 7, 6, 5};       // Assign the row pin numbers for the keypad
byte colPins[COLS] = {4, 3, 1};           // Assign the column pin numbers for the keypad

//Create an object of keypad
Keypad myKeypad = Keypad( makeKeymap(keys), rowPins, colPins, ROWS, COLS );
The global variables used:
					boolean PresentValue = false;             // Flag to indicate whether an operator has been selected
boolean Final = false;                    // Flag to indicate whether the calculation is ready to be performed
String Num1, Num2;                        // Strings to store the numbers entered by the user
int Answer = 0;                           // Stores the result of the calculation
char Operator;                            // Stores the selected operator (+ or -)
The setup() function initializes the LCD, displays a welcome message, and configures button pins:
					void setup()
{
  lcd.init();                             // Initialize the LCD display
  lcd.backlight();
  lcd.setCursor(3,0);                     // Set the cursor position for the title
  lcd.print("SHABAKAH");
  lcd.setCursor(3,1);
  lcd.print("Calculator");
  delay(3000);                            // Display the title for 3 seconds
  lcd.clear();                            // Clear the LCD screen

  // Initialize Buttons
  pinMode(SHBK_BTN, INPUT);               //pulled-down and debounce accounted for externally
  pinMode(SHBK_BTN_BOOT, INPUT_PULLUP);   //No external pull-up, must be done internally

}
In the Main l loop() function, we continuously read input from the keypad, handle numeric key inputs, operator selection (‘+’ or ‘-‘), calculation, and clearing the calculator:
					void loop() {
  char key = myKeypad.getKey();           // Read the key

  if (key != NO_KEY && (key == '1' || key == '2' || key == '3' || key == '4' || key == '5' || key == '6' || key == '7' || key == '8' || key == '9' || key == '0'))
  {
    if (PresentValue != true)             // if the operator is not pressed yet
    {
      Num1 = Num1 + key;
      int NumLength = Num1.length();      // to determine Num1 length
      lcd.setCursor(0, 0);
      lcd.print(Num1);
    }
    else
    {
      Num2 = Num2 + key;
      int NumLength = Num2.length();
      int NumLength1 = Num1.length();
      lcd.setCursor(1 + NumLength1, 0);   // setting the cursor position one column ahead of Num1
      lcd.print(Num2);
      Final = true;
    }
  }
  // Handle '+' operation
 else if( !digitalRead(SHBK_BTN_BOOT) )   // pressing the boot button
  {
    if (PresentValue == false)
    {
      int NumLength = Num1.length();
      PresentValue = true;
      Operator = '+';
      lcd.setCursor(0 + NumLength, 0);
      lcd.print(Operator);
    }

  }
  // Handle '-' operation
   else if( digitalRead(SHBK_BTN) )       // pressing the boot button
  {
    if (PresentValue == false)
    {
      int NumLength = Num1.length();
      PresentValue = true;
      Operator = '-';
      lcd.setCursor(0 + NumLength, 0);
      lcd.print(Operator);
    }

  }
  // Handle calculation and display result
  else if (Final == true && key != NO_KEY && key == '=') {

    if (Operator == '+')
    {
      Answer = Num1.toInt() + Num2.toInt();
    }
    else if (Operator == '-')
     {
      Answer = Num1.toInt() - Num2.toInt();
    }

    lcd.clear();
    lcd.setCursor(8, 1);
    lcd.autoscroll();
    lcd.print(Answer);
    lcd.noAutoscroll();

  }
  // Handle clearing the calculator
  else if (key != NO_KEY && key == 'C') {
    lcd.clear();
    PresentValue = false;
    Final = false;
    Num1 = "";
    Num2 = "";
    Answer = 0;
    Operator = ' ';
  }
}
We have created a simple calculator that can execute addition and subtraction operations using Shabakah board LCD display and keypad, Which is a great way to learn how to program microcontrollers. You can create your own interactive calculator by referring to the provided code and following this step-by-step tutorial. After successfully building the basic calculator, you can consider expanding the project by adding more advanced features.
Got any comments or feedback? Leave them below!