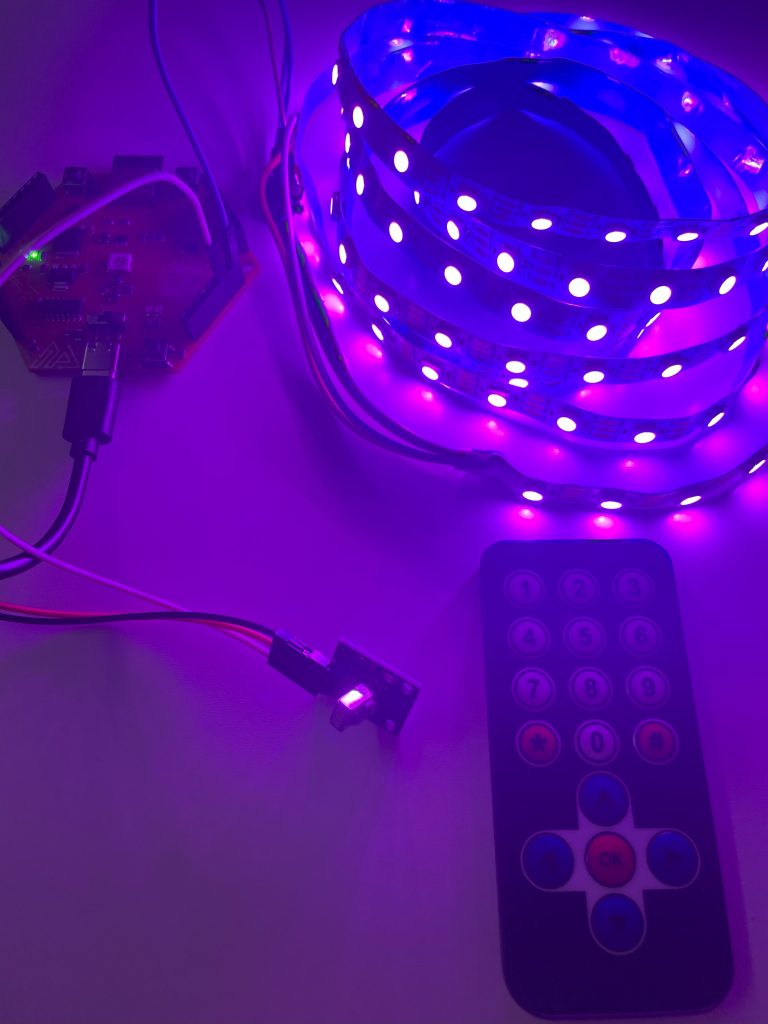
Imagine being able to push a button and instantly alter the tone in your space. We’re going to create a color-changing LED strip controller utilizing Shabakah board and an IR remote control to accomplish that. In order to modify the colors shown by an addressable LED strip, our project requires a device that can recognize commands via an IR remote control. You may adjust the lighting configuration to fit your mood or the occasion since each button on the remote controls a particular color.
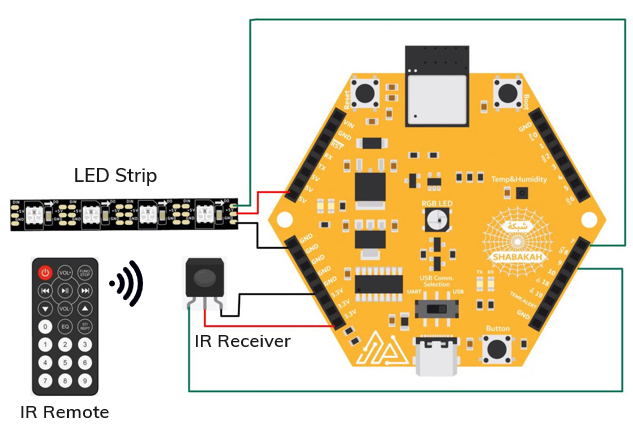
This is the microcontroller of the project, which controls other components’ behavior and runs code. It reads IR receiver signals and adjusts the LED strip accordingly.
Detects infrared signals sent by the IR remote control and translates them into electrical signals that the Arduino can understand. It allows interaction with the LED strip through the remote control.
A handheld device with buttons that emit specific IR signals when pressed. These signals are received by the IR receiver, allowing users to change LED strip colors and create diverse lighting scenarios.
A strip of LEDs, each with individual control, enabling the creation of intricate lighting patterns and effects. The Arduino sends color data to the LEDs, resulting in a customizable visual display.
Wires used to establish connections between components.
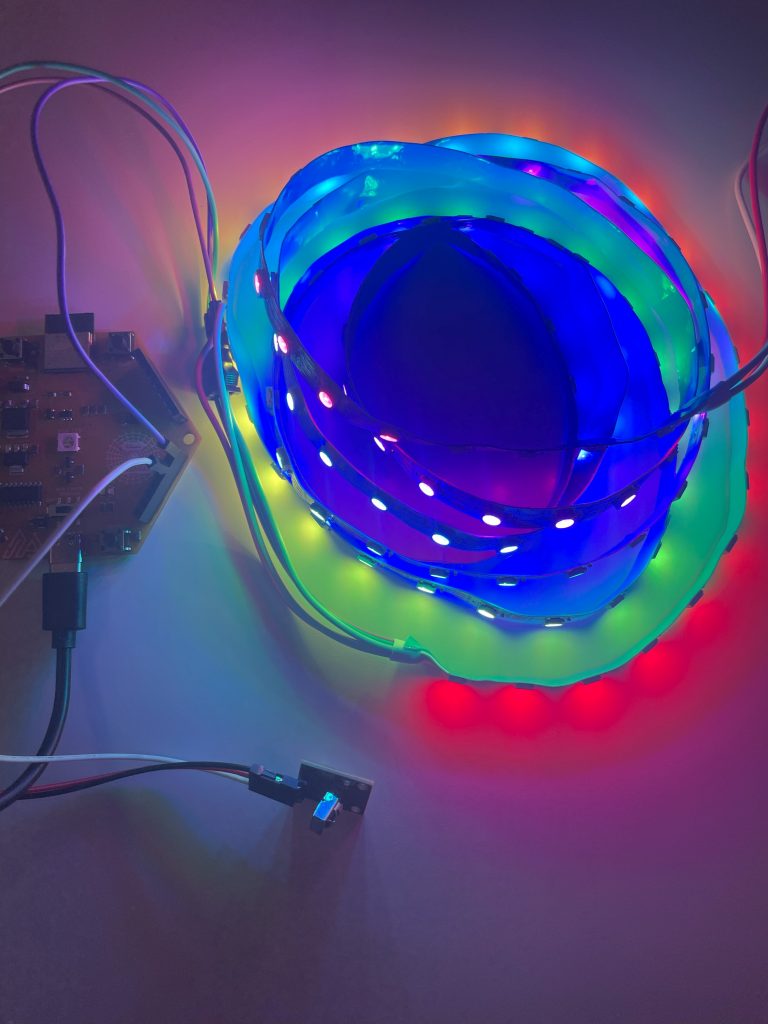
Each button press on the remote control emits a specific IR signal, which is decoded by the IR receiver and used to trigger the corresponding action defined in the switch cases of the code. In this way, you can easily control the colors displayed by the LED strip to create a captivating and dynamic lighting experience in your space.
Here’s the list of the buttons on the remote control and the corresponding colors emitted by the LED strip in the provided project:
– LED Strip Color: Green
– LED Strip Color: Red
– LED Strip Color: Blue
4. Button “4”:
– LED Strip Color: Magenta
– LED Strip Color: Orange
– LED Strip Color: Yellow
– LED Strip Color: Pink
– LED Strip Color: Light Blue
– LED Strip Color: Lime Green
– LED Strip Color: Sky Blue
– LED Strip Color: Rainbow
– LED Strip Color: White
– Turn Off LED Strip
This project’s code is rather simple. The code is written in Arduino, you can can find it below and the main parts of the code explained along with what they do.
					/**
* @file   ledstrip_IR6.ino
* @author Hoor AlAli, Remal IoT
* @date   10 July 2023
*
* @brief  The purpose of this project is to control an addressable LED strip using an infrared (IR) remote
*         control. The code receives IR signals, compares them to predefined values, and sets specific
*         colors on the LED strip based on the pressed button. The "ok" button turns the LED Strip off.
*
*         In this project, we rely on open-source libraries. We appreciate the creators of those libraries
*         for their contribution to the open-source community!
*
*/

#include <IRremote.h>  // Include necessary IR library
#include <Adafruit_NeoPixel.h>  // Include Adafruit NeoPixel library

#define PIN 7          // Pin connected to the LED strip
#define NUMPIXELS 120  // Number of NeoPixels on the strip

IRrecv IR(9);  // Pin connected to the IR receiver
Adafruit_NeoPixel pixels(NUMPIXELS, PIN, NEO_GRB + NEO_KHZ800);

void setup() {
  IR.enableIRIn();  // Enable the IR receiver
  Serial.begin(9600);
  pixels.begin();   // Initialize NeoPixel strip object
}

void loop() {
  pixels.clear();  // Set all pixel colors to 'off'

  if (IR.decode()) {
    Serial.println(IR.decodedIRData.decodedRawData, HEX);
    delay(50);
    IR.resume();  // Read the next value

    switch (IR.decodedIRData.decodedRawData) {
      case 0xBA45FF00: // Keypad button "1"
        for (int i = 0; i < NUMPIXELS; i++) {
          pixels.setPixelColor(i, pixels.Color(0, 150, 0)); // Green
        }
        pixels.show();
        break;

      case 0xB946FF00: // Keypad button "2"
        for (int i = 0; i < NUMPIXELS; i++) {
          pixels.setPixelColor(i, pixels.Color(150, 0, 0)); // Red
        }
        pixels.show();
        break;

      case 0xB847FF00: // Keypad button "3"
        for (int i = 0; i < NUMPIXELS; i++) {
          pixels.setPixelColor(i, pixels.Color(0, 0, 150)); // Blue
        }
        pixels.show();
        break;

      case 0xBB44FF00: // Keypad button "4"
        for (int i = 0; i < NUMPIXELS; i++) {
          pixels.setPixelColor(i, pixels.Color(255, 0, 255)); // Magenta
        }
        pixels.show();
        break;

      case 0xBF40FF00: // Keypad button "5"
        for (int i = 0; i < NUMPIXELS; i++) {
          pixels.setPixelColor(i, pixels.Color(255, 69, 0)); // Orange
        }
        pixels.show();
        break;

      case 0xBC43FF00: // Keypad button "6"
        for (int i = 0; i < NUMPIXELS; i++) {
          pixels.setPixelColor(i, pixels.Color(255, 140, 0)); // Yellow
        }
        pixels.show();
        break;

      case 0xF807FF00: // Keypad button "7"
        for (int i = 0; i < NUMPIXELS; i++) {
          pixels.setPixelColor(i, pixels.Color(204, 0, 102)); // Pink
        }
        pixels.show();
        break;

      case 0xEA15FF00: // Keypad button "8"
        for (int i = 0; i < NUMPIXELS; i++) {
          pixels.setPixelColor(i, pixels.Color(0, 204, 204)); // Light Blue
        }
        pixels.show();
        break;

      case 0xF609FF00: // Keypad button "9"
        for (int i = 0; i < NUMPIXELS; i++) {
          pixels.setPixelColor(i, pixels.Color(50, 205, 50)); // Lime Green
        }
        pixels.show();
        break;

      case 0xE916FF00: // Keypad button "*"
        for (int i = 0; i < NUMPIXELS; i++) {
          pixels.setPixelColor(i, pixels.Color(72, 61, 255)); // Sky Blue
        }
        pixels.show();
        break;

      case 0xE619FF00: // Keypad button "0"
        for (int i = 0; i < NUMPIXELS; i++) {
          pixels.rainbow(i); // Rainbow effect
        }
        pixels.show();
        break;

      case 0xF20DFF00: // Keypad button "#"
        for (int i = 0; i < NUMPIXELS; i++) {
          pixels.setPixelColor(i, pixels.Color(255, 255, 255)); // White
        }
        pixels.show();
        break;

      case 0xE31CFF00: // Keypad button "ok"
        pixels.clear(); // Turn off all pixels
        pixels.show();
        break;
    }
  }
}
We start by including the necessary libraries IR communication and controlling NeoPixels:
					#include <IRremote.h>
#include <Adafruit_NeoPixel.h>
Define constants for the LED strip’s pin, the number of NeoPixels in the strip, and initializes an instance of the IR receiver:
					#define PIN        7 // pin on Shabakah is connected to the LED strip
#define NUMPIXELS 120 // number of NeoPixels are attached to the Shabakah


IRrecv IR(9);       // Pin conected to the IR receiver

Adafruit_NeoPixel pixels(NUMPIXELS, PIN, NEO_GRB + NEO_KHZ800);
Initialize the IR receiver module, the NeoPixel strip object, and the serial communication in the setup() function:
					void setup() {
  // put your setup code here, to run once:
  IR.enableIRIn();  // enable the IR receiver
  Serial.begin(9600);
  pixels.begin(); // INITIALIZE NeoPixel strip object (REQUIRED)
}
In the loop() function we continuously check for incoming IR signals using IR.decode(). If an IR signal is received, it’s printed in hexadecimal format, and a brief delay is introduced to ensure accurate readings. The hexadecimal address that will be printed in the serial monitor will indicate the button we pressed, each button has a different address.
					void loop() {

  pixels.clear(); // Set all pixel colors to 'off'

  if( IR.decode()){
    Serial.println(IR.decodedIRData.decodedRawData,HEX);
    delay(50);
    IR.resume();      // Read again
A switch statement is used to handle different IR signals (button presses) based on their hexadecimal values. Each case in the switch statement corresponds to a button press on the IR remote. For each button press on the IR remote, the LED strip colors based on the pressed button:
					    switch (IR.decodedIRData.decodedRawData) {
      case 0xBA45FF00: // Keypad button "1"
        for (int i = 0; i < NUMPIXELS; i++) {
          pixels.setPixelColor(i, pixels.Color(0, 150, 0)); // Green
        }
        pixels.show();
        break;

      case 0xB946FF00: // Keypad button "2"
        for (int i = 0; i < NUMPIXELS; i++) {
          pixels.setPixelColor(i, pixels.Color(150, 0, 0)); // Red
        }
        pixels.show();
        break;

      case 0xB847FF00: // Keypad button "3"
        for (int i = 0; i < NUMPIXELS; i++) {
          pixels.setPixelColor(i, pixels.Color(0, 0, 150)); // Blue
        }
        pixels.show();
        break;

      case 0xBB44FF00: // Keypad button "4"
        for (int i = 0; i < NUMPIXELS; i++) {
          pixels.setPixelColor(i, pixels.Color(255, 0, 255)); // Magenta
        }
        pixels.show();
        break;

      case 0xBF40FF00: // Keypad button "5"
        for (int i = 0; i < NUMPIXELS; i++) {
          pixels.setPixelColor(i, pixels.Color(255, 69, 0)); // Orange
        }
        pixels.show();
        break;

      case 0xBC43FF00: // Keypad button "6"
        for (int i = 0; i < NUMPIXELS; i++) {
          pixels.setPixelColor(i, pixels.Color(255, 140, 0)); // Yellow
        }
        pixels.show();
        break;

      case 0xF807FF00: // Keypad button "7"
        for (int i = 0; i < NUMPIXELS; i++) {
          pixels.setPixelColor(i, pixels.Color(204, 0, 102)); // Pink
        }
        pixels.show();
        break;

      case 0xEA15FF00: // Keypad button "8"
        for (int i = 0; i < NUMPIXELS; i++) {
          pixels.setPixelColor(i, pixels.Color(0, 204, 204)); // Light Blue
        }
        pixels.show();
        break;

      case 0xF609FF00: // Keypad button "9"
        for (int i = 0; i < NUMPIXELS; i++) {
          pixels.setPixelColor(i, pixels.Color(50, 205, 50)); // Lime Green
        }
        pixels.show();
        break;

      case 0xE916FF00: // Keypad button "*"
        for (int i = 0; i < NUMPIXELS; i++) {
          pixels.setPixelColor(i, pixels.Color(72, 61, 255)); // Sky Blue
        }
        pixels.show();
        break;

      case 0xE619FF00: // Keypad button "0"
        for (int i = 0; i < NUMPIXELS; i++) {
          pixels.rainbow(i); // Rainbow effect
        }
        pixels.show();
        break;

      case 0xF20DFF00: // Keypad button "#"
        for (int i = 0; i < NUMPIXELS; i++) {
          pixels.setPixelColor(i, pixels.Color(255, 255, 255)); // White
        }
        pixels.show();
        break;

      case 0xE31CFF00: // Keypad button "ok"
        pixels.clear(); // Turn off all pixels
        pixels.show();
        break;
    }